Adding interest to your cards can be done in many ways! One great way is to add background images. You can do that by using Stampin’ Up!’s Designer Series Paper or you can create your own! These cards were created using background paper that I created. One major benefit is that you can custom coordinate the colors in your background cardstock.
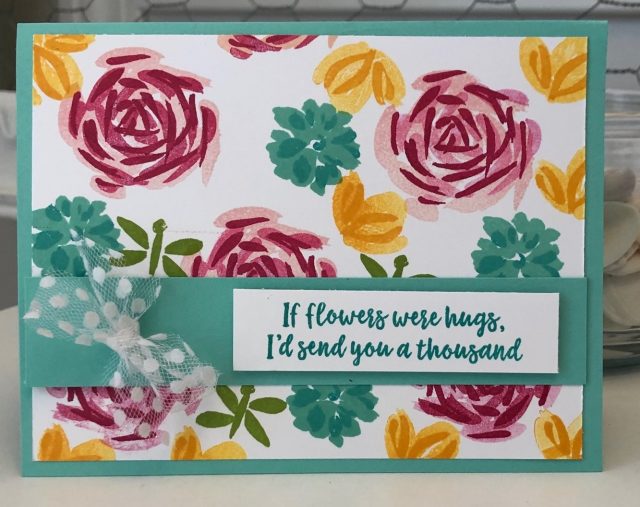
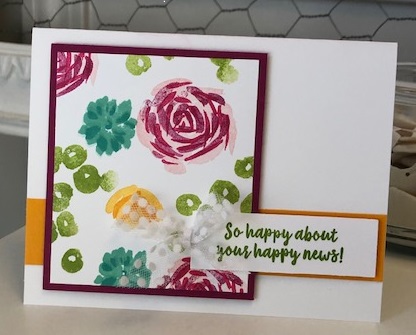

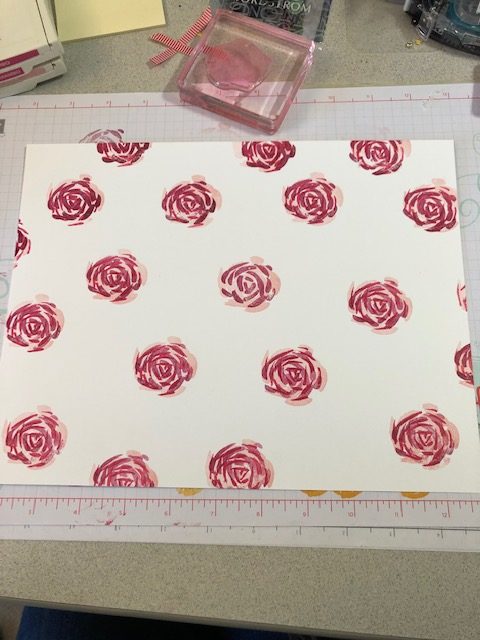
To start off choose a neutral cardstock and a stamp set that works best for the look you want. If you choose a line-art stamp set (one that you would color in) it would give you an interesting black and white look or a single color look. If you choose a solid image stamp set, you can easily add color. An even better way to add a lot of color is to use a two-step stamp set like the one I used here (Abstract Impressions). Next you will need to choose the size of cardstock you want to use for the projects you have planned. Here I chose 8 1/2 inches x 11 inches Whisper White cardstock. 
If you are choosing to use multiple images for the background, start by stamping the largest image repeatedly on the cardstock being sure to leave space to stamp the other images you are planning on using. Here I have stamped the first of the two-step image of the rose from Abstract Impressions in Blushing Bride ink. Next I stamped the second image of the two-step image using Lovely Lipstick that was stamped off one time to give it a lighter shade. Then I stamped the third image of rose in a full on inked image in Lovely Lipstick.

The second image I stamped was a smaller flower image. Again with this two-step image, start with the lighter shade and then in the darker shade. Here I stamped in Costal Cabana and then in Bermuda Bay. When stamping this second image I left space for the next two images I was planning on using. 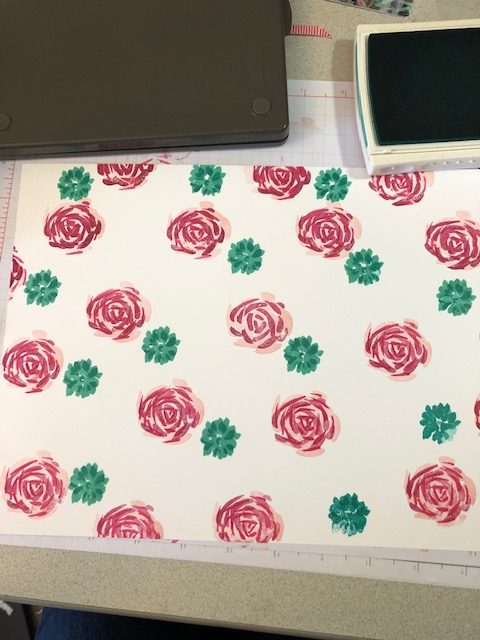
I stamped the last two-step image in Mango Melody. The first image was stamped off so that it would be lighter and then I stamped the second image in full strength Mango Melody. I finished the background paper by stamping the final image in Granny Apple Green. Once the full sheet is done simply cut the pieces you need for the cards you are creating. Set aside the rest to use for future cards!
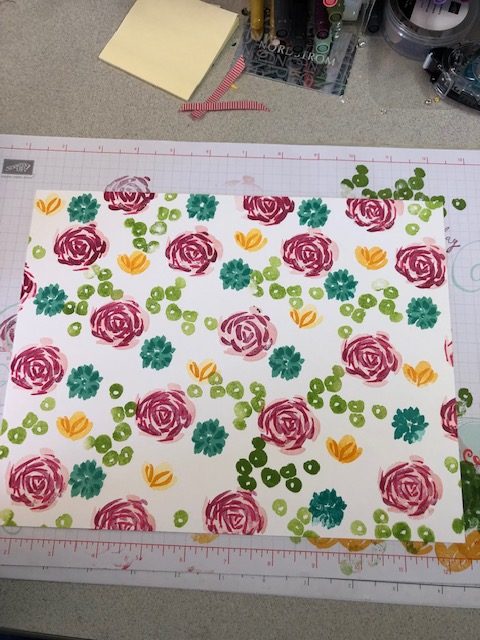
Here is what I used on this background:
Whisper White cardstock (8 1/2 x 11)
Abstract Impressions stamp set (147513)
Lovely Lipstick stamp pad (147140)
Blushing Bride stamp pad (147100)
Costal Cabana stamp pad (147097)
Bremuda Bay stamp pad (147096)
Mango Melody stamp pad (147093)
Granny Apple Green stamp pad (147095)
